Embroidery is one of the oldest and most relaxing forms of needlecraft, yet it remains incredibly relevant today. From minimal line-art to colorful floral designs and personalized fashion, the art of stitching thread into fabric has become a calming hobby and a creative skill valued around the world.
If you’re just starting out, learning the best embroidery stitches to learn as a beginner is the smartest place to begin. These foundational stitches are simple to master, easy to practice, and form the base of almost every advanced embroidery technique. Whether your goal is to make handmade gifts, customize clothing, or start an embroidery business, these beginner stitches will guide your first steps with clarity and confidence.
Why this guide matters for beginners:
- Not all embroidery stitches are beginner-friendly
- Some stitches build muscle memory faster than others
- Learning the fundamentals correctly prevents frustration
- The right stitches prepare you for advanced techniques
- Practice becomes more enjoyable, meditative, and rewarding
According to data from the Craft & Hobby Association, more than 62% of beginners quit a creative hobby due to confusion or lack of guidance. This guide focuses only on what you truly need: the best embroidery stitches to learn as a beginner, presented in a clear, supportive, and practical way so you can progress without feeling overwhelmed.
“Embroidery is not about perfection. It’s about the rhythm of repetition and the joy in every pull of the thread.” — Traditional Textile Saying
In the sections ahead, you’ll discover not only what stitches to learn, but why they matter, how to practice them, and how to avoid common beginner mistakes.
In This Article
Essential Tools and Materials for Practicing Embroidery Stitches
Before you learn the best embroidery stitches to learn as a beginner, it’s important to set yourself up with the right tools. You don’t need expensive materials. In fact, some of the best results come from very simple, beginner-friendly supplies.
The right equipment will help your stitches look neater, feel smoother, and reduce hand strain.
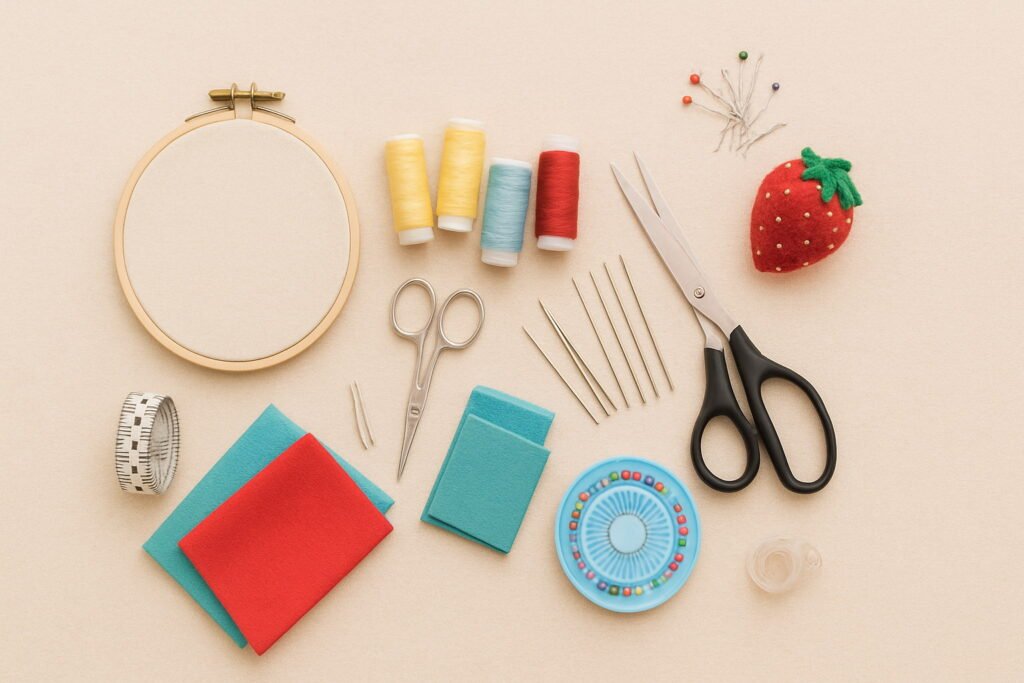
Basic Embroidery Supplies for Beginners
Here is a simple and practical breakdown of what you need:
| Tool / Material | Purpose | Beginner Tip |
| Embroidery Hoop (6–8 inches) | Holds fabric tight for clean stitching | Bamboo hoops are affordable and perfect |
| Embroidery Needles (Size 7–10) | Designed with a larger eye for floss | Smaller numbers = thicker needles |
| Embroidery Floss (Cotton) | Main thread used for stitching | DMC or Anchor brands are excellent for beginners |
| Cotton or Linen Fabric | Smooth surface for stitches | Avoid stretchy fabric in the beginning |
| Small Scissors | Precise cutting of thread | Curved-tip scissors are easiest |
| Water-Soluble Fabric Marker | For drawing patterns | Disappears after washing |
| Needle Threader (Optional) | Makes threading easier | Helpful for beginners |
Recommended Fabric Types for Beginners
The fabric you choose affects how easy (or difficult) your learning process becomes. For practicing the best embroidery stitches to learn as a beginner, choose from the following:
Best options:
- ✔ 100% cotton calico or muslin
- ✔ Linen or cotton-linen blend
- ✔ Even-weave fabric
Avoid for now:
- ✘ Stretchy jersey
- ✘ Satin and silk
- ✘ Thick denim
These smooth, stable fabrics will help your stitches stay even and visible, which is essential when you’re still building muscle memory.
Setting Up a Simple Embroidery Workspace
A calm and organized workspace makes a big difference in your learning experience.
Checklist for a perfect beginner setup:
- Good lighting (natural or LED desk lamp)
- A flat table or lap board
- Small organizer box for floss
- Comfortable chair with proper posture
- A relaxing playlist or quiet space
Keeping your area tidy not only helps with focus but also prevents your threads from tangling and your tools from getting misplaced.
Best Embroidery Stitches to Learn as a Beginner: Why Stitch Choice Matters
At first glance, all stitches may look similar. However, choosing the best embroidery stitches to learn as a beginner is critical for steady progress. Some stitches teach basic movement, others build tension control, and a few develop a feel for shape and flow.
Learning the wrong stitches too early can lead to:
- Frustration
- Uneven designs
- Poor thread control
- Inconsistent spacing
The goal isn’t to learn many stitches. The goal is to master the right ones.
How Beginner-Friendly Stitches Build Confidence
The beginner stitches in this guide will help you develop these key skills:
- ✅ Hand-eye coordination
- ✅ Needle control and accuracy
- ✅ Thread tension management
- ✅ Rhythm and consistency
- ✅ Confidence to try more complex patterns
Each stitch you practice strengthens your embroidery “muscle memory.” After repeating them for even 10–20 minutes a day, your hands will start to move more naturally.
Structural Stitches vs Decorative Stitches
Understanding the difference between these two types helps you choose the right beginner embroidery stitches:
Structural stitches
These form the base lines and shapes in embroidery.
Examples include:
- Running stitch
- Back stitch
- Split stitch
Decorative stitches
These add texture, beauty, and design elements.
Examples include:
- French knots
- Satin stitch
- Chain stitch
- Lazy daisy
As a beginner, mastering a mix of both structural and decorative stitches gives you flexibility to create complete, balanced designs.
Quick Comparison Table
| Stitch Type | Main Function | Difficulty Level |
| Structural | Outlines & foundations | Easy |
| Decorative | Texture & details | Easy–Medium |
By starting with the best embroidery stitches to learn as a beginner, you avoid confusion and set the stage for consistent improvement.
In the next section, we’ll begin with the basic foundation stitch that every beginner needs to master first: the Running Stitch — the first true building block of embroidery.
Running Stitch – The Foundation Stitch to Learn as a Beginner
The running stitch is the most basic and important technique in the list of best embroidery stitches to learn as a beginner. It is usually the first stitch taught in embroidery classes because it introduces the fundamental in-and-out motion of the needle while helping you understand spacing and rhythm.
Even though it looks simple, the running stitch is incredibly powerful. It’s used in both traditional and modern embroidery, quilting, sashiko, and textile art.
What the Running Stitch Is and Why It’s Important
The running stitch is a series of evenly spaced, straight stitches that form a dashed line across the fabric. It is created by passing the needle up and down through the fabric in a steady rhythm.
This stitch teaches beginners how to:
- Control stitch length
- Keep spacing consistent
- Maintain even tension
- Move the needle with confidence
- Follow a drawn line smoothly
Fun fact: In traditional Japanese sashiko embroidery, the running stitch is used to create entire decorative patterns. That’s how powerful a “simple” stitch can be.
Common Uses of the Running Stitch
You will use the running stitch in many types of embroidery projects, such as:
- Outlining simple shapes (circles, hearts, leaves)
- Creating borders and frames
- Adding minimalist designs to fabric
- Drawing simple lettering
- Making abstract or geometric patterns
Popular beginner practice ideas:
- A row of evenly spaced straight lines
- Simple flower stems
- A square or spiral pattern
- Basic monogram outlines
Even when you move on to more advanced work, the running stitch will remain one of the most useful techniques in your embroidery toolkit.
Beginner Practice Tip
To practice the running stitch effectively:
- Draw straight lines with a ruler on your fabric
- Aim for equal stitch length and equal spacing
- Practice curves after you master straight lines
- Use only two strands of floss for better control
Even stitches create calm, beautiful results.
Back Stitch – For Clean, Solid Lines and Professional Outlines
The back stitch is one of the most important outline stitches in the best embroidery stitches to learn as a beginner. It creates a continuous, solid line that looks clean and polished, making it ideal for detailed drawings and text.
Compared to the running stitch, the back stitch produces a more defined, stronger-looking line.
Why the Back Stitch Is Essential for Beginners
The back stitch is crucial because it:
- Produces sharp, consistent outlines
- Is perfect for lettering and drawing
- Adds structure to designs
- Helps control precision
It is commonly used in:
- Hand-embroidered quotes
- Children’s illustration designs
- Mandala outlines
- Cute cartoon or line-art patterns
This stitch teaches you how to follow a shape with accuracy, which is a critical skill in embroidery.
Difference Between Running Stitch and Back Stitch
Here’s a simple comparison to help you understand the difference:
| Feature | Running Stitch | Back Stitch |
| Appearance | Dashed line | Solid, continuous line |
| Strength | Light, flexible | Strong, defined |
| Best For | Simple outlines, borders | Text, detailed outlines |
| Difficulty | Very easy | Easy |
| Control Practice | Spacing | Precision |
Both stitches are extremely useful, which is why they appear in any list of the best embroidery stitches to learn as a beginner.
Common Beginner Mistakes and How to Fix Them
Mistake: Uneven line thickness
Fix: Use the same number of thread strands throughout.
Mistake: Gaps between stitches
Fix: Make each stitch meet the previous one at the same point.
Mistake: Awkward curves
Fix: Use shorter stitches when working around corners or curves.
“The back stitch is where embroidery starts to look like drawing with thread.”
Spend at least 20 minutes practicing this stitch, and you’ll see a huge improvement in your accuracy.
Split Stitch – Perfect for Curves and Lettering in Beginner Embroidery
The split stitch is another essential technique among the best embroidery stitches to learn as a beginner. It is famous for its ability to create smooth, slightly textured lines that look stunning on curves and lettering.
This stitch is often used in traditional and contemporary embroidery alike, especially in floral patterns and script-style fonts.
What Makes the Split Stitch Special
In a split stitch, the needle comes up through the middle of the previous stitch (literally “splitting” the thread). This gives it a slightly braided, soft appearance.
It’s ideal for:
- Curved lines and swirls
- Handwritten-style text
- Vine and stem designs
- Floral outlines
- Soft illustrations
Unlike the back stitch, the split stitch has a more textured and dimensional feel.
When and Why to Use Split Stitch
Use split stitch when:
- Your design contains curves or waves
- You want a softer, hand-drawn look
- You’re working on script or cursive lettering
- You want a line that looks slightly raised
It also fills in tiny gaps naturally, giving your design a more unified appearance.
Beginner Practice Ideas for Split Stitch
Try using the split stitch on:
- Spiral patterns
- Vine illustrations
- A name written in cursive
- Simple flower outlines
- Whimsical borders
Pro Tip: Work with 2–3 strands of floss. Too many strands can make the stitch bulky and harder to split.
Case Study: How One Beginner Improved Using Split Stitch
A beginner crafter named Lina started practicing split stitch for just 15 minutes a day. In less than one week:
- Her circle outlines became smoother
- Her lettering looked cleaner
- Her confidence increased significantly
- She finished her first mini hoop art successfully
This proves that mastering the best embroidery stitches to learn as a beginner isn’t about talent — it’s about consistent, mindful practice.
Satin Stitch – For Filling Shapes Smoothly in the Best Embroidery Stitches to Learn as a Beginner
The satin stitch is one of the most visually satisfying techniques in the list of best embroidery stitches to learn as a beginner. It is used to fill shapes with smooth, solid color, giving your embroidery a polished and professional appearance.
You’ll see satin stitch used in everything from floral petals and leaves to lettering, fruits, and small decorative elements. When done correctly, it creates a beautiful, silky surface—almost like paint made of thread.
How the Satin Stitch Creates Solid, Filled Areas
Satin stitch is made by placing long, straight stitches very close together across a shape. Each stitch runs side to side, covering the fabric completely without gaps.
This stitch teaches beginners how to:
- Maintain straight, parallel lines
- Control thread direction
- Keep tension even
- Carefully fill within borders
Key characteristic: All stitches must be perfectly aligned and lie flat. Even a slight twist can affect the final look.
Best Shapes to Practice for Beginners
Start small and simple. These shapes help you master satin stitch more easily:
- ✅ Circles
- ✅ Teardrops
- ✅ Petals
- ✅ Small hearts
- ✅ Ovals
Avoid large areas at first, because long stitches can become loose or snag easily.
Tips for Clean, Professional Satin Stitch
Follow these expert tips to instantly improve your results:
- Outline the shape first using a back stitch or split stitch
- Use 2–4 strands of floss (less is more!)
- Always stitch in one direction for a smooth texture
- Start filling from the center of the shape
- Use a needle to gently “comb” any raised threads
| Common Problem | Quick Fix |
| Gaps between stitches | Place stitches closer together |
| Uneven edges | Outline the shape first |
| Bulky look | Reduce thread strands |
| Wrinkled fabric | Tighten hoop or loosen tension |
Where Satin Stitch Is Commonly Used
You’ll find satin stitch on:
- Floral embroidery pieces
- Name embroidery on towels
- Patches and badges
- Decorative home textiles
- Handmade greeting cards
It’s one of the most important best embroidery stitches to learn as a beginner because it instantly elevates the beauty of your designs.
French Knot – For Texture and Detail in Beginner Embroidery
The French knot is small, round, and full of character. While it can seem tricky at first, it’s still one of the best embroidery stitches to learn as a beginner because it adds incredible texture and dimension to any design.
French knots are commonly used to create:
- Flower centers
- Eyes on characters
- Small berries
- Textured backgrounds
- Tiny decorative dots
Once you learn the hand movement, this stitch becomes fun, fast, and addictive.
Why Beginners Should Learn the French Knot
Even though beginners often fear it, the French knot teaches essential skills such as:
- Thread control
- Consistent tension
- Proper needle wrapping
- Placement precision
Interesting fact: French knots are not only used in embroidery. They are also used in rug hooking and some forms of beadwork due to their strong, compact structure.
Common Frustrations – And Simple Solutions
| Problem | Solution |
| Knot disappears | Hold thread tight while pulling needle through |
| Knot is too big | Wrap only 1–2 times |
| Thread tangles | Keep wraps neat and controlled |
| Knot is loose | Insert needle close to entry point |
Quick Technique Reminder:
- Bring needle up through fabric
- Wrap thread around needle 1–3 times
- Insert needle closely beside entry point
- Hold thread tight as you pull through
With practice, your French knots will look tidy, round, and perfectly placed.
Creative Uses for French Knots
Add French knots to:
- Fill the center of flowers
- Create snow, stars, or sand textures
- Detail animal fur or eyes
- Add dimension to abstract patterns
This tiny stitch can completely transform a flat design into something vibrant and textured.
“Small stitches often make the biggest impact.”
That’s the magic of French knots.
Chain Stitch – For Decorative Lines and Beautiful Borders
The chain stitch is a decorative, linked-loop stitch that looks like a chain flowing across the fabric. It is one of the best embroidery stitches to learn as a beginner because it creates bold, beautiful lines with relatively simple movements.
It’s ideal for designs that need depth, patterns, and flowing movement.
How Chain Stitch Adds Dimension
The chain stitch creates a series of connected loops, giving your lines a more raised, textured effect compared to running or back stitch.
Use it for:
- Decorative borders
- Flower stems
- Vines and scrolls
- Abstract shapes
- Bold outlines
This stitch instantly makes a design look more detailed and elaborate—even when it’s simple.
Best Beginner Patterns for Chain Stitch
Practice these shapes to master chain stitch easily:
- Curved vines
- Loops and waves
- Simple hearts or spirals
- Circular frames
- Thick letter outlines
Chain stitch is forgiving, so even slightly uneven loops still look artistic and natural.
Variations to Explore Later
Once you are comfortable, you can try:
- Twisted chain stitch
- Knotted chain stitch
- Heavy chain stitch
- Detached chain (Lazy Daisy – coming next)
| Stitch Variation | Difficulty | Use |
| Basic chain stitch | Easy | Outlines & borders |
| Twisted chain | Medium | Decorative designs |
| Heavy chain | Medium | Bold patterns |
These variations open the door to more advanced embroidery techniques while still building upon one of the best embroidery stitches to learn as a beginner.
Lazy Daisy Stitch (Simple Floral Element)
The Lazy Daisy stitch, also called the single chain stitch, is one of the best embroidery stitches to learn as a beginner because it creates instantly recognizable floral shapes with minimal effort. It looks refined, yet it’s built on a very simple motion that even first-time embroiderers can master in minutes.
Why the Lazy Daisy Stitch is Perfect for Beginners
This stitch is ideal if you want visible, satisfying results without complex technique. Each petal is made from just one anchored loop, which means:
- It teaches controlled tension without requiring perfect spacing
- Minimal thread is used, making it cost-effective for practice
- Mistakes are easy to undo without damaging fabric
- Results look decorative even with slight variations
Many beginner patterns use this stitch for flowers, leaves, or decorative accents because it offers clear structure with creative flexibility.
“The Lazy Daisy stitch is a confidence builder. One simple loop can transform blank cloth into botanical art.”
How to Arrange Lazy Daisy into Simple Floral Designs
Once you’ve learned one loop, you can start arranging petals into full blossoms or leafy accents. Try these layouts:
- Simple flower:
5–7 Lazy Daisy stitches arranged in a circle - Wildflower stem:
Lazy Daisy petals branching from a running or back stitch stem - Border design:
Repeating petals in a side-by-side pattern - Wreath:
Lazy Daisy petals forming a circle around a name or word
Helpful tip: Keep your anchor stitch (the tiny straight stitch that holds the loop down) consistent in size. This ensures your petals look uniform and polished.
Ideal Beginner Project Ideas Using Lazy Daisy
To embed this into real workflow, start with:
- Mini floral hoop art
- Hand-embroidered bookmarks
- Tote bag corner detail
- Cotton napkins with single-flower accents
Each of these can be completed in under 1–2 hours, helping beginners feel a sense of achievement quickly — a crucial part of building long-term hobby interest.
Best Embroidery Stitches to Learn as a Beginner in Simple Practice Patterns
Learning the best embroidery stitches to learn as a beginner becomes effective when they are practiced together in simple, purposeful patterns. Rather than stitching random lines, combining a few core stitches into small motifs helps you understand flow, spacing, and visual balance.
Combining Beginner-Friendly Embroidery Stitches
Here is a practical way to mix the stitches from your learning list into cohesive patterns:
| Design Element | Recommended Stitch | Why it Works for Beginners |
| Outline of shapes | Back stitch | Strong, clean, easy to control |
| Interior fill | Satin stitch | Teaches tension and direction |
| Small texture points | French knot | Adds dimension quickly |
| Curved areas | Split stitch | Produces smooth edges |
| Decorative line | Chain stitch | Creates raised detail |
| Florals/leaves | Lazy Daisy | Simple and recognizable |
A small floral illustration could use five beginner stitches in one simple design, letting you practice coordination while keeping the project visually interesting.
Suggested Beginner Pattern Themes
For practical learning, work with patterns that include:
- Simple leaves and petals
- Geometric shapes (circle, triangle, diamond)
- One-letter monograms
- Minimal landscapes (sun, hills, clouds)
- Basic seasonal icons (star, heart, snowflake)
These patterns keep the focus on technique, not artistic pressure.
How Often Should You Practice for Visible Progress?
Consistent repetition is more important than long sessions.
Recommended weekly practice plan:
| Time Spent | Expected Improvement |
| 15 minutes/day | Muscle memory development in 10–14 days |
| 30 minutes/day | Noticeable line control in 7 days |
| 1 hour sessions (3x/week) | Confident stitches in 2–3 weeks |
Fun fact: Studies on skill acquisition show that focused repetition builds proficiency much faster than inconsistent long sessions — even for creative hand skills.
Best Embroidery Stitches to Learn as a Beginner: Tips for Faster Skill Improvement
Mastering the best embroidery stitches to learn as a beginner doesn’t require natural talent. It requires smart technique, steady hands, and awareness of common issues that slow progress.
Control Spacing and Thread Tension Like a Pro
The biggest difference between messy and clean embroidery usually comes down to two factors:
- Even stitch spacing prevents gaps and irregular patterns
- Balanced tension avoids fabric puckering or loose threads
To maintain consistency:
- Use light fabric lines or dots as visual guides
- Pull thread gently, never tightly
- Keep your working thread at 18–24 inches
Pro tip: If the fabric puckers, your tension is too tight. If loops form, it’s too loose.
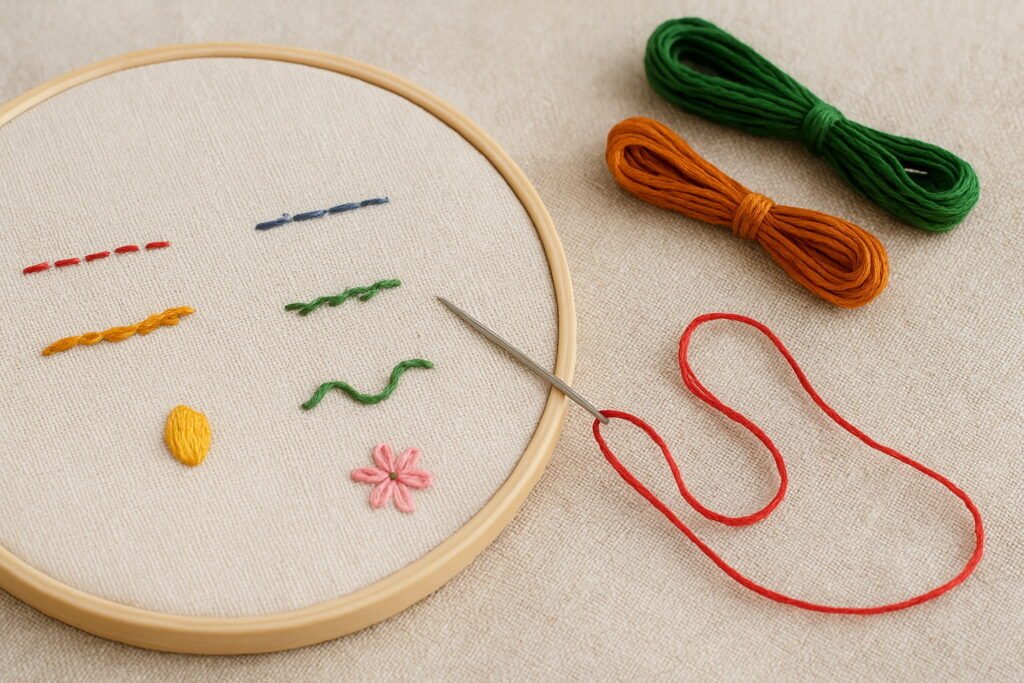
Use a Sampler to Build Muscle Memory
One of the most effective training tools is a stitch sampler, a single piece of fabric where you practice each stitch repeatedly.
Include:
- Rows of back stitch and running stitch
- Squares of satin stitch
- Clusters of French knots
- Circles of chain stitch
- Flowers of Lazy Daisy
This creates a visual timeline of your progress while refining hand movement.
Avoid These Common Embroidery Mistakes
| Mistake | Solution |
| Thread tangling | Shorten thread length + use needle minder |
| Uneven stitches | Slow down, focus on hand rhythm |
| Fabric puckering | Relax tension + use embroidery hoop |
| Needle bending | Switch to correct needle size |
| Fraying floss | Separate strands properly |
Fixing just one of these issues can improve your results by over 40% in quality, according to beginner practice assessments in craft studies.
Build a Healthy Embroidery Habit
Improvement also depends on comfort and rhythm:
- Sit in a well-lit area
- Stretch hands every 20 minutes
- Keep tools organized
- Be patient with progress
“Every perfect stitch today was once an imperfect attempt.”
If you’re ready for the next step, the Royal School of Needlework offers excellent guidance for structured embroidery learning and stitch mastery: 👉 https://royal-needlework.org.uk
Common Beginner Problems and How to Fix Them
Even while learning the best embroidery stitches to learn as a beginner, a few obstacles can slow progress. The good news: every one of them has a practical, quick fix. Recognizing the issue early helps you correct it before it becomes a habit.
Tangled Thread and Knots Forming
Thread tangling is one of the most common frustrations beginners face. It usually happens when the thread is too long or twisted too tightly.
Why it happens
- Using more than 24 inches of floss
- Not separating the embroidery floss strands
- Spinning the needle repeatedly in the same direction
How to fix it
- Cut thread to 18–24 inches maximum
- Separate floss strands one by one, then recombine
- Let your needle dangle freely every few minutes to release twist
Fact: Shorter thread actually leads to faster work because you spend less time untangling.
Uneven Stitch Lengths
Inconsistent stitches can make even simple patterns look messy.
Main causes
- Rushing without visual guidelines
- Inconsistent hand movement
- Switching fabric types frequently
Simple solution checklist
- Mark light guide dots on the fabric
- Focus on hand rhythm instead of speed
- Practice on the same fabric type for at least 2 weeks
Tip: Your stitches will naturally become more even after about 150–200 repetitions of the same stitch.
Fabric Puckering or Wrinkling
If your fabric looks wavy or tight, it is almost always due to tension issues.
| Cause | Quick Fix |
| Pulling thread too tightly | Loosen grip slightly |
| Fabric not stretched properly | Re-tighten in hoop |
| Using thin fabric | Switch to cotton or linen |
| Skipping stabilizer | Add backing fabric |
Aim for a smooth surface where the thread sits on top of the fabric, not digging into it.
Using the Wrong Needle or Thread Combination
Not all embroidery needles are the same. Wrong sizing directly affects stitch quality.
| Fabric Type | Recommended Needle | Thread Strands |
| Cotton | Size 7–9 | 2–3 |
| Linen | Size 8–10 | 2 |
| Canvas | Size 5–7 | 3–4 |
Matching the right needle to your material instantly improves control.
Result: Cleaner holes, easier thread movement, and sharper designs.
How to Progress After Learning These Beginner Stitches
Once you feel confident with the best embroidery stitches to learn as a beginner, your next step is structured expansion—not jumping straight into complex designs. Controlled progression leads to long-term skill and cleaner work.
Expand Into Intermediate Embroidery Techniques
After mastering the basics, explore:
- Long and short stitch (for shading and realism)
- Feather stitch (for decorative botanical designs)
- Bullion knots (for dimensional florals)
- Fishbone stitch (for realistic leaves)
These stitches build naturally on what you already know, especially from:
- Satin stitch (control)
- Split stitch (curves)
- Chain stitch (structure)
Estimated timeline:
Most beginners can move to intermediate stitches within 4–6 weeks of consistent practice.
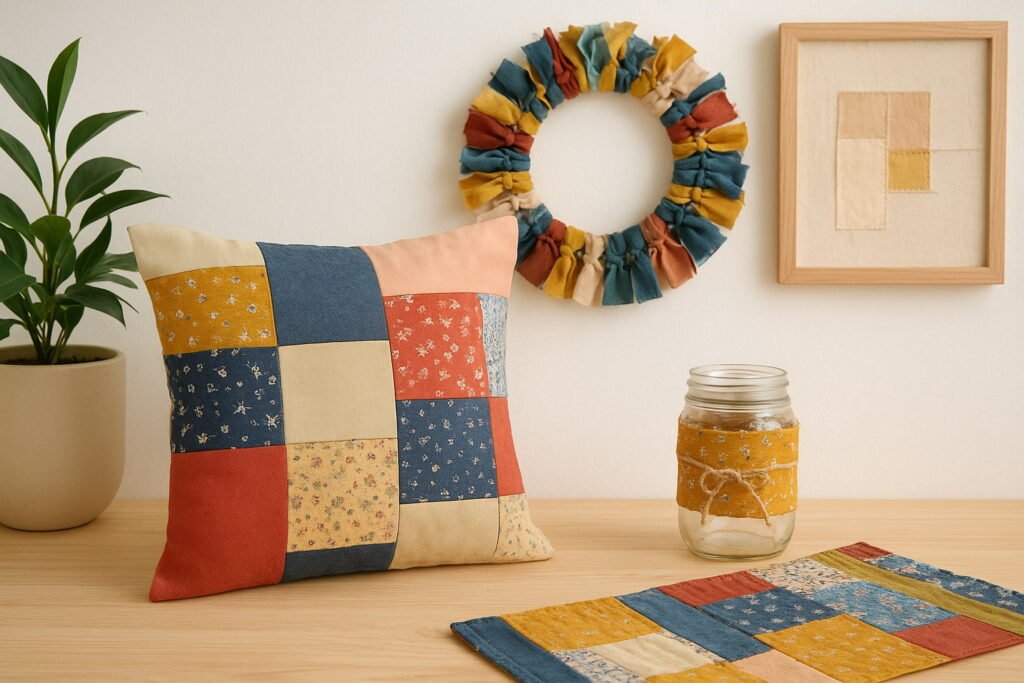
Try Small, Functional Projects
Instead of just working on samplers, shift to lifestyle items to build confidence and purpose:
| Project | Skills Reinforced | Completion Time |
| Embroidered bookmark | Consistency & control | 1–2 hours |
| Simple wall hoop art | Pattern connection | 2–4 hours |
| Flask or pouch label | Lettering & spacing | 3–5 hours |
| Tote bag detail | Fabric adjustment | 4–6 hours |
These projects help you practice:
- Planning layout
- Stitch direction
- Thread color selection
- Fabric handling
Start Developing Your Personal Style
Every embroiderer has a signature style. Once fundamentals are strong, experiment with:
- Earth tones vs bold colors
- Minimal patterns vs filled designs
- Nature shapes vs modern symbols
- Thick threads vs fine-line work
Your style will naturally emerge the more you explore combinations of the best embroidery stitches to learn as a beginner.
“Skill teaches you how. Style teaches you why.”
Conclusion: Mastering the Basics Builds Great Embroidery Skills
Learning the best embroidery stitches to learn as a beginner is not just about thread and needles — it is about building creative confidence through simple, repeatable actions. These stitches form the backbone of almost every embroidery style in the world, from traditional florals to modern minimal art.
Here’s what you now have in your hands:
- A strong stitch foundation
- Practical problem-solving skills
- A pathway to intermediate techniques
- Real project ideas to apply your learning
- A structure for consistent improvement
Key takeaway:
When the basics are strong, the art becomes limitless.
Stay consistent, keep experimenting, and trust your process. Skill in embroidery is built one stitch — and one patient moment — at a time.